
To connect xplore to linux samba shares you are really doing two jobs that happen to meet in the middle: Samba, the Linux file-sharing service, has to publish a folder with a dialect and a user account the phone accepts, and X-plore has to be pointed at that share with the right address and credentials. Windows sharing hides most of this behind wizards; Linux exposes it in one honest configuration file, /etc/samba/smb.conf, which is why Linux shares are simultaneously easier to fix and easier to break with a single stale line. This guide builds the share from the server side first, then connects from X-plore, then tunes the protocol settings that decide whether the connection is fast and stable or refused outright.
Install and Prepare Samba on the Linux Machine
On Debian and Ubuntu, install the service with sudo apt install samba; on Fedora, sudo dnf install samba. Create the folder you intend to share if it does not exist — a typical choice is a dedicated directory such as /srv/share or a folder inside your home directory — and make sure your Linux user owns it or has the access you intend to publish, because Samba cannot grant over the network what the local filesystem denies. Decide now on the access model: a named Samba user with a password is the right default for a phone, while guest shares trade away accountability for convenience and are increasingly refused by modern clients when authentication is misconfigured. You will also need the machine’s local IP address, and it is worth reserving that address in your router now, because a Samba server whose address changes weekly generates the same “it worked before” mystery on Linux as it does on Windows.
Write a Clean, Minimal Share in smb.conf
Open /etc/samba/smb.conf with sudo in a text editor. Two sections matter: [global], which sets behaviour for the whole server, and one named section per share. A sane modern starting point looks like this, written as plain settings you can reproduce line by line:
- In [global]: workgroup = WORKGROUP
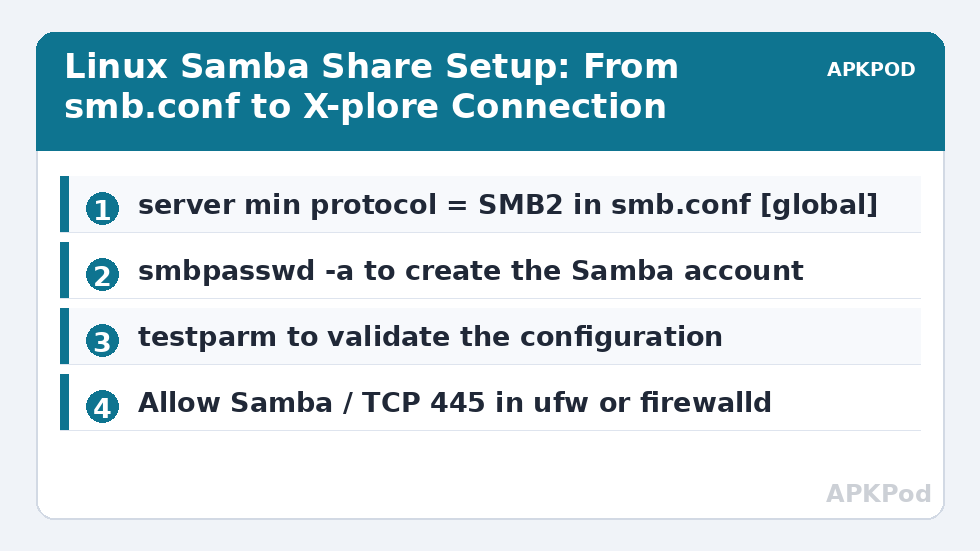
- In [global]: server min protocol = SMB2 — this refuses the obsolete SMB1 dialect while staying compatible with older SMB2 clients
- In [global]: server max protocol can be left at its modern default (SMB3) on current Samba versions
- A share section headed [phone-share] — the name in brackets is the name X-plore will see
- Inside the share: path = /srv/share, pointing at the real folder
- Inside the share: browseable = yes and read only = no if the phone should be able to upload, yes if it should only read
- Inside the share: valid users = your Linux username, restricting the share to that account
Before restarting anything, run testparm, Samba’s own configuration checker. It parses smb.conf and reports syntax errors and the effective settings, and it has saved more evenings than any other Samba tool — a share that “does not exist” is very often a configuration file the service failed to load cleanly. Then restart the service with sudo systemctl restart smbd, and enable it at boot with sudo systemctl enable smbd so the share survives reboots.
Give Samba Its Own Password for Your User
Here is the step newcomers miss: Samba maintains its own password database, separate from your Linux login password. An account that exists in Linux but was never added to Samba will be refused no matter how correct the share looks. Add yourself with sudo smbpasswd -a yourusername, set a Samba password when prompted, and enable the account with sudo smbpasswd -e yourusername. The Samba password can match your login password for convenience, but understand they are stored and changed separately — change one and the phone’s saved credential silently goes stale, producing an access denied error that looks exactly like a permissions problem. This is the same credential-caching trap described for Windows in our guide to fixing SMB connection failed and access denied errors, because the failure lives in the authentication layer, not the operating system.
Open the Firewall and Confirm Samba Is Listening
Most desktop Linux installs and many server installs run a firewall — ufw on Ubuntu, firewalld on Fedora — that will silently drop SMB traffic until Samba is allowed. On ufw, sudo ufw allow samba opens the necessary ports; on firewalld, sudo firewall-cmd –permanent –add-service=samba followed by a reload does the same. Modern SMB needs TCP port 445; the older NetBIOS ports 137–139 belong to the SMB1 era and do not need opening for a modern SMB2/3 setup, and leaving them closed is tidier security. Confirm the service is listening with ss -tlnp piped through grep for 445, and confirm from another device on the network if you can — isolating whether a failure is server-side or phone-side before touching X-plore saves a great deal of random tapping.
| Setting or command | Where it lives | What it controls |
|---|---|---|
| server min protocol = SMB2 | smb.conf, [global] | Refuses SMB1; raise only with care, lower only for legacy clients |
| path, read only, valid users | smb.conf, share section | Which folder is published, whether uploads are allowed, and who may connect |
| smbpasswd -a | Terminal | Adds a user to Samba’s own password database |
| testparm | Terminal | Validates smb.conf and prints the effective configuration |
| TCP 445 allowed | ufw or firewalld | Lets modern SMB traffic reach the server at all |
| systemctl restart smbd | Terminal | Applies configuration changes — Samba does not fully reload share changes until restarted |
Bottleneck:
Tip:
All figures are estimates under good local conditions — strong signal, no competing traffic, both devices on the same network. Real speeds drop with distance, walls, channel congestion and slow storage on either device. Protocol options (SMB, FTP, SFTP) assume a 5 GHz-class Wi-Fi link.
Connect Xplore to Linux Samba Shares From the Phone
On the phone, open X-plore’s LAN section and add a server manually rather than relying on the LAN server scan: discovery of Linux hosts depends on extra services such as WS-Discovery or mDNS that a minimal Samba install may not run, while a direct connection needs nothing but the address. Enter the Linux machine’s reserved IP, your Samba username, and the Samba password you set with smbpasswd — not automatically your Linux login password. Open the server, and the share name from your smb.conf brackets should appear; browse in, open a small file to verify reading, then use X-plore’s dual pane view to copy a test file from phone storage into the share to verify writing if you set read only = no. Save the server entry once it works, so future sessions are one tap. The Network Setup category covers the same pattern for other hosts, and readers migrating from a Windows server will find the concepts map across directly from connecting X-plore to Windows shared folders — Samba is an implementation of the same SMB protocol, which is the whole point.
Troubleshooting the Three Failures That Actually Happen
Connection refused or an instant failure almost always means the service is not running, the firewall is closed, or the phone has the wrong address; verify smbd is active and port 445 is listening before anything else. Access denied with a correct-looking password means the Samba account layer: the user was never added with smbpasswd, the account is disabled, the share’s valid users line excludes them, or the underlying Linux folder permissions deny the account — remember Samba and filesystem permissions both apply, and the stricter one wins. A share that connects but shows no folder, or a folder name that never appears, points back at smb.conf: run testparm, confirm the share section has no typo, and restart smbd, because a malformed configuration can leave Samba running with shares missing. If connections work but large transfers crawl, that is a network-layer question, not a Samba one — work through fixing slow Wi-Fi transfer speeds in X-plore after confirming a wired client copies at full speed.
Frequently Asked Questions
Why is my Samba password different from my Linux login password?
Because Samba keeps its own password database for network authentication. Adding a user with smbpasswd creates that separate credential, and changing your Linux login password later does not update it. When X-plore suddenly reports access denied after a password change, update the Samba password — or the saved credential in X-plore — to match again.
What should server min protocol be set to in smb.conf?
SMB2 is the sensible floor for a home network: it blocks the insecure, obsolete SMB1 dialect while remaining compatible with essentially every modern client, including X-plore. Only lower it temporarily for a genuinely legacy device, and never expose a server running SMB1 to the internet.
X-plore connects but my share does not appear. What is wrong?
Usually the share never loaded: a typo in smb.conf, a missing restart of smbd after editing, or browseable set to no. Run testparm to see the configuration Samba actually parsed, fix any error it reports, restart smbd, and reconnect. Also confirm you are looking for the bracketed share name, not the folder’s path name.
Do I need to open ports 137, 138, and 139 for Samba?
No, not for a modern setup. Those NetBIOS ports belong to the SMB1 era. SMB2 and SMB3 run over TCP port 445 alone, so allowing Samba through ufw or firewalld — which in practice means port 445 for current clients — is sufficient, and leaving the legacy ports closed is better security.
Can X-plore write files to the share, or only read them?
It can write if both layers allow it: the share must not be read only in smb.conf, and the Linux folder permissions must let your Samba user write to the directory. If uploads fail while browsing works, check the folder’s ownership and permissions on the Linux machine first — that is the layer most often responsible.